Webページ経由で利用者がEventBridgeの実行ルールを管理する方式の解説

EC2からVPCエンドポイントを使用して、EventBridgeのルールをセキュアな閉域通信で操作できるようになった記事を公開しました。
こちらを見た時に、何かできないかなと思って作ってみました。
開発環境などのEC2を夜間自動停止して、朝方に自動起動させる運用をされている方は多くないですか?
そして、この自動停止と起動ですが、結構利用者から「夜も使うから今週は停止させないで。」とかが私が担当していたシステムでは発生していました。
依頼があるたびに、いちいちスケジュール変更して面倒だったんですよね。
であれば、せっかくなのでWebページを公開して、そこから利用者にて変更できるようにしてみようというのが今回の紹介内容です!

こちらを見た時に、何かできないかなと思って作ってみました。
開発環境などのEC2を夜間自動停止して、朝方に自動起動させる運用をされている方は多くないですか?
そして、この自動停止と起動ですが、結構利用者から「夜も使うから今週は停止させないで。」とかが私が担当していたシステムでは発生していました。
依頼があるたびに、いちいちスケジュール変更して面倒だったんですよね。
であれば、せっかくなのでWebページを公開して、そこから利用者にて変更できるようにしてみようというのが今回の紹介内容です!
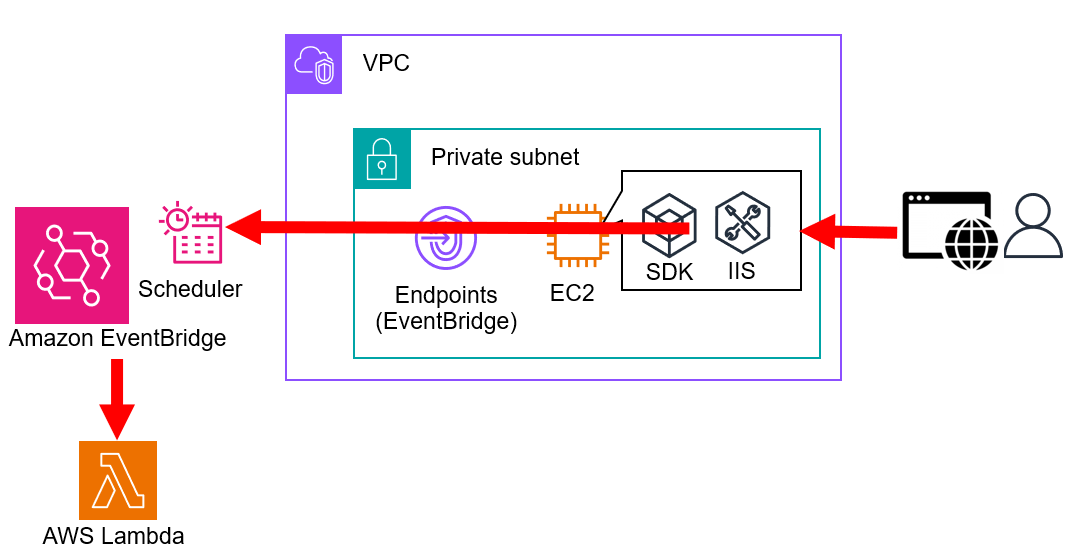
構成
利用者がブラウザ経由で、EC2のIIS上で公開しているWebサービスにアクセスし、その画面でEventBridgeルールの今のスケジュール確認と変更が可能なようにします。
EventBridgeのルール変更はEC2から実行させたいので、利用者ブラウザで動作させるフロントエンド処理ではなく、EC2内のバックエンド処理としました。
EC2自体は、パブリックに公開してもしなくてもよいので、社内向きのプライベートだけで公開するような形にすればセキュリティ的にも担保できます。
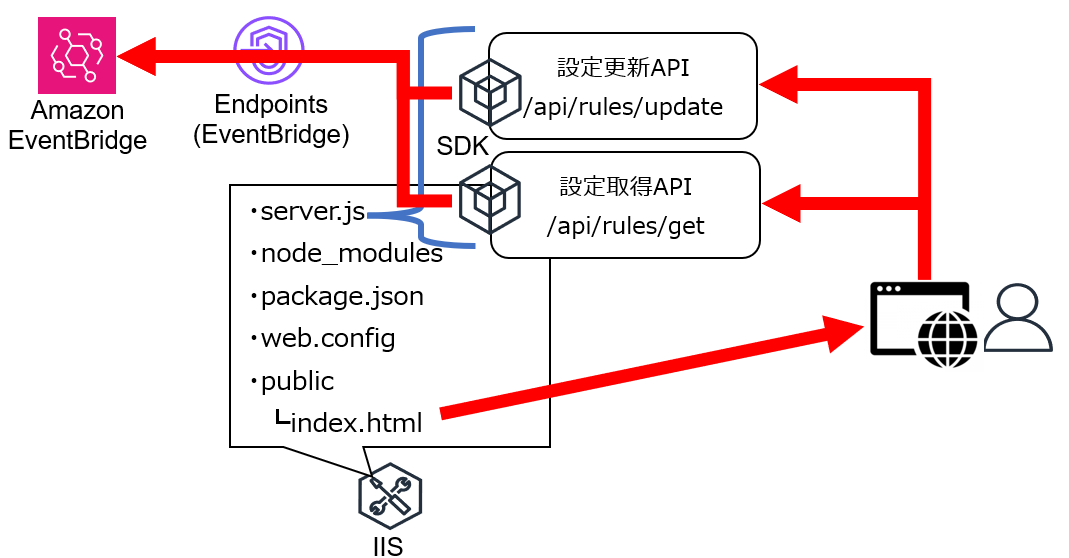
Webアプリケーションの構成にフォーカスした図も載せておきます。
バックエンドとしてはNode.jsを使用して、IISで使用するために「iisnode」と「URL Rewriteモジュール」を追加インストールしています。
public配下のindex.htmlが通常のWebページコンテンツを提供して、ブラウザ上に表示されます。
Webページ内から参照や更新の実行が指示されるとIISで待機させている参照用APIと更新用APIを叩かせます。
APIが叩かれたらサーバ側で指示に従って、EventBridgeルールの操作を行うという流れです。
EventBridgeのルール変更はEC2から実行させたいので、利用者ブラウザで動作させるフロントエンド処理ではなく、EC2内のバックエンド処理としました。
EC2自体は、パブリックに公開してもしなくてもよいので、社内向きのプライベートだけで公開するような形にすればセキュリティ的にも担保できます。
Webアプリケーションの構成にフォーカスした図も載せておきます。
バックエンドとしてはNode.jsを使用して、IISで使用するために「iisnode」と「URL Rewriteモジュール」を追加インストールしています。
public配下のindex.htmlが通常のWebページコンテンツを提供して、ブラウザ上に表示されます。
Webページ内から参照や更新の実行が指示されるとIISで待機させている参照用APIと更新用APIを叩かせます。
APIが叩かれたらサーバ側で指示に従って、EventBridgeルールの操作を行うという流れです。
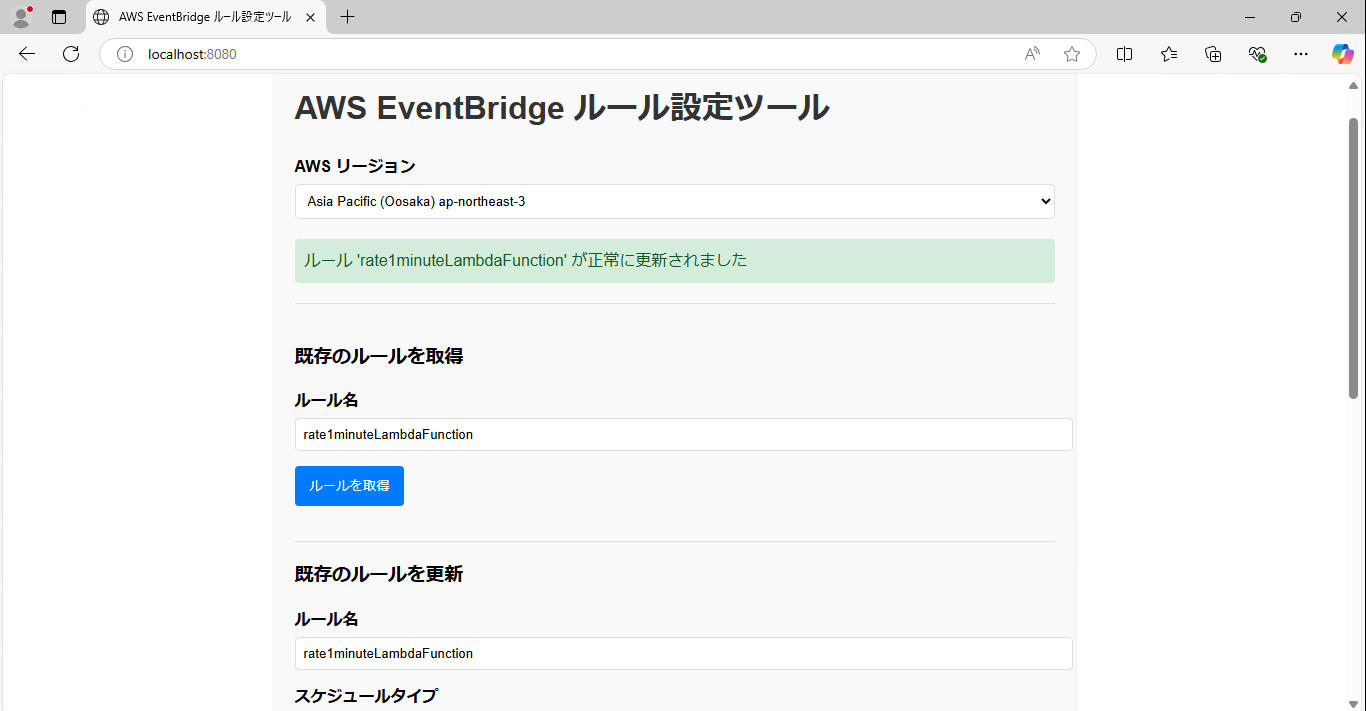
成果物イメージ
今回作ったものの最終成果物のイメージです。
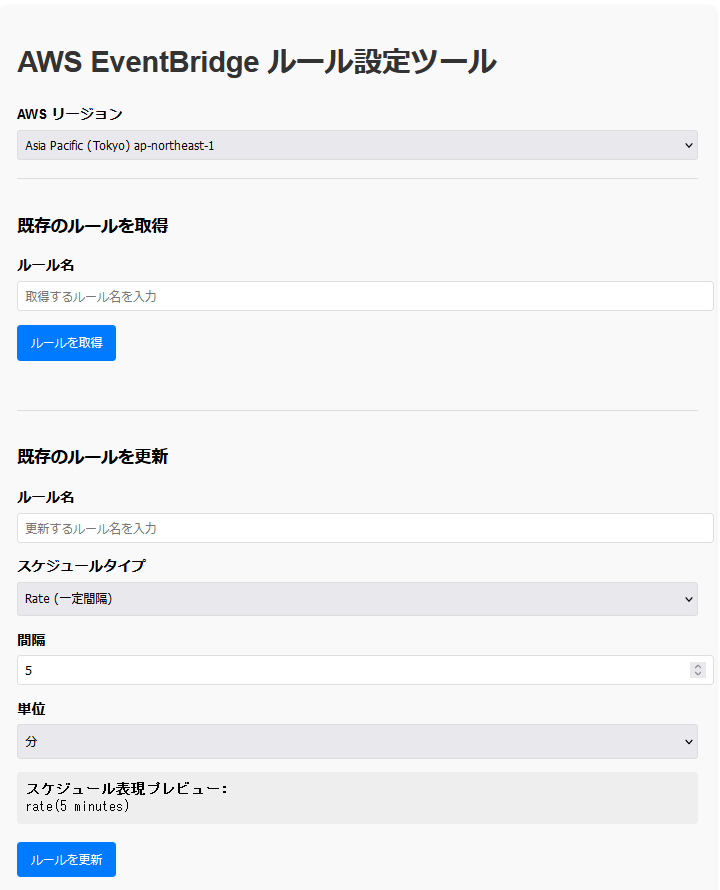
一番はじめにリージョンの設定があり、「既存のルールを取得」を行うとエンドポイント経由で現在の情報を取得して「既存のルールを更新」に自動的に入ります。
設定変更したければ、値を変更して「ルールを更新」ボタンを押せばOKです。
一番はじめにリージョンの設定があり、「既存のルールを取得」を行うとエンドポイント経由で現在の情報を取得して「既存のルールを更新」に自動的に入ります。
設定変更したければ、値を変更して「ルールを更新」ボタンを押せばOKです。
作業前提
- EC2およびEC2用のIAMロールとEventBridge用のVPCエンドポイントは事前に作成済みとします。
- サーバはWindows Server2025を使って検証しています。
- EventBridgeは事前に作成済みとします。
- サーバはインターネットにつながらない前提として、インストールモジュールやプログラムは別の環境で作成し持ち込むというシナリオとします。
機能検証
持ち込み資材の準備
①以下のURLからNode.jsとiisnode、「URL Rewriteモジュール」をそれぞれダウンロードします。・Node.js
・iisnode
・URL Rewrite モジュール
②AWSのCloudShellで以下のコマンドを実行して、Webアプリケーションで使用するライブラリをダウンロードします。
sudo su -
cd /home/cloudshell-user/
mkdir eventbridge-manager
cd eventbridge-manager
npm init -y
npm install express body-parser aws-sdk
③HTMLを書きます。
mkdir public
vi index.html
ファイルには以下のHTMLを記載してください。
<!DOCTYPE html>
<html lang="ja">

<head>
    <meta charset="UTF-8">
    <meta name="viewport" content="width=device-width, initial-scale=1.0">
    <title>AWS EventBridge ルール設定ツール</title>
    <style>
        body {
            font-family: Arial, sans-serif;
            max-width: 800px;
            margin: 0 auto;
            padding: 20px;
        }

        .container {
            background-color: #f9f9f9;
            border-radius: 8px;
            padding: 20px;
            box-shadow: 0 2px 5px rgba(0, 0, 0, 0.1);
        }

        h1 {
            color: #333;
        }

        .form-group {
            margin-bottom: 15px;
        }

        label {
            display: block;
            margin-bottom: 5px;
            font-weight: bold;
        }

        input,
        select {
            width: 100%;
            padding: 8px;
            border: 1px solid #ddd;
            border-radius: 4px;
        }

        button {
            background-color: #007bff;
            color: white;
            border: none;
            padding: 10px 15px;
            border-radius: 4px;
            cursor: pointer;
        }

        button:hover {
            background-color: #0069d9;
        }

        button:disabled {
            background-color: #cccccc;
            cursor: not-allowed;
        }

        .status-message {
            margin-top: 20px;
            padding: 10px;
            border-radius: 4px;
        }

        .success {
            background-color: #d4edda;
            color: #155724;
        }

        .error {
            background-color: #f8d7da;
            color: #721c24;
        }

        .schedule-preview {
            margin-top: 15px;
            font-family: monospace;
            background-color: #eee;
            padding: 10px;
            border-radius: 4px;
        }

        .advanced-section {
            margin-top: 20px;
            border-top: 1px solid #ddd;
            border-bottom: 1px solid #ddd;
            padding-top: 20px;
            padding-bottom: 20px;
        }

        .loading {
            display: inline-block;
            width: 20px;
            height: 20px;
            margin-left: 10px;
            border: 3px solid rgba(0, 0, 0, 0.1);
            border-radius: 50%;
            border-top-color: #007bff;
            animation: spin 1s ease-in-out infinite;
        }

        @keyframes spin {
            to {
                transform: rotate(360deg);
            }
        }
    </style>
</head>

<body>
    <div class="container">
        <h1>AWS EventBridge ルール設定ツール</h1>

        <div class="form-group">
            <label for="region">AWS リージョン</label>
            <select id="region">
                <option value="us-east-1">US East (N. Virginia) us-east-1</option>
                <option value="us-east-2">US East (Ohio) us-east-2</option>
                <option value="us-west-1">US West (N. California) us-west-1</option>
                <option value="us-west-2">US West (Oregon) us-west-2</option>
                <option value="ap-northeast-1" selected>Asia Pacific (Tokyo) ap-northeast-1</option>
                <option value="ap-northeast-3">Asia Pacific (Oosaka) ap-northeast-3</option>
                <option value="ap-northeast-2">Asia Pacific (Seoul) ap-northeast-2</option>
                <option value="ap-southeast-1">Asia Pacific (Singapore) ap-southeast-1</option>
                <option value="ap-southeast-2">Asia Pacific (Sydney) ap-southeast-2</option>
                <option value="eu-central-1">Europe (Frankfurt) eu-central-1</option>
                <option value="eu-west-1">Europe (Ireland) eu-west-1</option>
            </select>
            <div id="statusMessage" class="status-message" style="display: none;"></div>
        </div>

        <div class="advanced-section">
            <h3>既存のルールを取得</h3>
            <div class="form-group">
                <label for="getRuleName">ルール名</label>
                <input type="text" id="getRuleName" placeholder="取得するルール名を入力">
            </div>
            <div class="form-group">
                <button id="getRuleButton">ルールを取得</button>
                <div id="getSpinner" class="loading" style="display: none;"></div>
            </div>
        </div>

        <h3>既存のルールを更新</h3>
        <div class="form-group">
            <label for="ruleName">ルール名</label>
            <input type="text" id="ruleName" placeholder="更新するルール名を入力">
        </div>

        <div class="form-group">
            <label for="scheduleType">スケジュールタイプ</label>
            <select id="scheduleType">
                <option value="rate">Rate (一定間隔)</option>
                <option value="cron">Cron (カスタムスケジュール)</option>
            </select>
        </div>

        <div id="rateSettings">
            <div class="form-group">
                <label for="rateValue">間隔</label>
                <input type="number" id="rateValue" min="1" value="5">
            </div>
            <div class="form-group">
                <label for="rateUnit">単位</label>
                <select id="rateUnit">
                    <option value="minutes">分</option>
                    <option value="hours">時間</option>
                    <option value="days">日</option>
                </select>
            </div>
        </div>

        <div id="cronSettings" style="display: none;">
            <div class="form-group">
                <label for="cronMinutes">分 (0-59)</label>
                <input type="text" id="cronMinutes" placeholder="例: 0,15,30,45 または * または */15">
            </div>
            <div class="form-group">
                <label for="cronHours">時 (0-23)</label>
                <input type="text" id="cronHours" placeholder="例: 0,12 または * または */3">
            </div>
            <div class="form-group">
                <label for="cronDayOfMonth">日 (1-31)</label>
                <input type="text" id="cronDayOfMonth" placeholder="例: 1,15 または *">
            </div>
            <div class="form-group">
                <label for="cronMonth">月 (1-12)</label>
                <input type="text" id="cronMonth" placeholder="例: 1,6 または *">
            </div>
            <div class="form-group">
                <label for="cronDayOfWeek">曜日 (1-7)</label>
                <input type="text" id="cronDayOfWeek" placeholder="例: 1,5 または * (1=月曜)">
            </div>
            <div class="form-group">
                <label for="cronYear">年 (省略可)</label>
                <input type="text" id="cronYear" placeholder="例: 2023 または *">
            </div>
        </div>

        <div class="schedule-preview">
            <strong>スケジュール表現プレビュー:</strong>
            <div id="schedulePreview"></div>
        </div>

        <div class="form-group" style="margin-top: 20px;">
            <button id="updateButton">ルールを更新</button>
            <div id="updateSpinner" class="loading" style="display: none;"></div>
        </div>
    </div>

    <script>
        const regionSelect = document.getElementById('region');
        const ruleNameInput = document.getElementById('ruleName');
        const scheduleTypeSelect = document.getElementById('scheduleType');
        const rateSettings = document.getElementById('rateSettings');
        const cronSettings = document.getElementById('cronSettings');
        const rateValue = document.getElementById('rateValue');
        const rateUnit = document.getElementById('rateUnit');
        const cronMinutes = document.getElementById('cronMinutes');
        const cronHours = document.getElementById('cronHours');
        const cronDayOfMonth = document.getElementById('cronDayOfMonth');
        const cronMonth = document.getElementById('cronMonth');
        const cronDayOfWeek = document.getElementById('cronDayOfWeek');
        const cronYear = document.getElementById('cronYear');
        const schedulePreview = document.getElementById('schedulePreview');
        const updateButton = document.getElementById('updateButton');
        const getRuleNameInput = document.getElementById('getRuleName');
        const getRuleButton = document.getElementById('getRuleButton');
        const statusMessage = document.getElementById('statusMessage');
        const updateSpinner = document.getElementById('updateSpinner');
        const getSpinner = document.getElementById('getSpinner');
        const API_BASE_URL = '/api';

        scheduleTypeSelect.addEventListener('change', function () {
            if (this.value === 'rate') {
                rateSettings.style.display = 'block';
                cronSettings.style.display = 'none';
            } else {
                rateSettings.style.display = 'none';
                cronSettings.style.display = 'block';
            }
            updateSchedulePreview();
        });

        [rateValue, rateUnit, cronMinutes, cronHours, cronDayOfMonth,
            cronMonth, cronDayOfWeek, cronYear].forEach(element => {
                element.addEventListener('input', updateSchedulePreview);
            });

        function updateSchedulePreview() {
            let expression = '';

            if (scheduleTypeSelect.value === 'rate') {
                expression = `rate(${rateValue.value} ${rateUnit.value})`;
            } else {
                const minutes = cronMinutes.value || '*';
                const hours = cronHours.value || '*';
                const dayOfMonth = cronDayOfMonth.value || '*';
                const month = cronMonth.value || '*';
                const dayOfWeek = cronDayOfWeek.value || '*';
                const year = cronYear.value || '*';

                expression = `cron(${minutes} ${hours} ${dayOfMonth} ${month} ${dayOfWeek} ${year})`;
            }

            schedulePreview.textContent = expression;
        }
        updateSchedulePreview();

        updateButton.addEventListener('click', async function () {
            try {
                const ruleName = ruleNameInput.value.trim();
                if (!ruleName) {
                    showStatus('ルール名を入力してください', 'error');
                    return;
                }
                updateButton.disabled = true;
                updateSpinner.style.display = 'inline-block';
                const scheduleExpression = schedulePreview.textContent;

                const requestData = {
                    region: regionSelect.value,
                    ruleName: ruleName,
                    scheduleExpression: scheduleExpression
                };

                const response = await fetch(`${API_BASE_URL}/rules/update`, {
                    method: 'POST',
                    headers: {
                        'Content-Type': 'application/json'
                    },
                    body: JSON.stringify(requestData)
                });

                const data = await response.json();

                if (!response.ok) {
                    throw new Error(data.message || 'ルールの更新中にエラーが発生しました');
                }

                showStatus(`ルール '${ruleName}' が正常に更新されました`, 'success');
            } catch (error) {
                console.error('ルールの更新中にエラーが発生しました:', error);
                showStatus(`エラー: ${error.message}`, 'error');
            } finally {
                updateButton.disabled = false;
                updateSpinner.style.display = 'none';
            }
        });

        getRuleButton.addEventListener('click', async function () {
            try {
                const ruleName = getRuleNameInput.value.trim();
                if (!ruleName) {
                    showStatus('ルール名を入力してください', 'error');
                    return;
                }

                getRuleButton.disabled = true;
                getSpinner.style.display = 'inline-block';

                const response = await fetch(`${API_BASE_URL}/rules/get?region=${regionSelect.value}&ruleName=${encodeURIComponent(ruleName)}`);

                const data = await response.json();

                if (!response.ok) {
                    throw new Error(data.message || 'ルールの取得中にエラーが発生しました');
                }
                ruleNameInput.value = data.Name;

                if (data.ScheduleExpression) {
                    const expression = data.ScheduleExpression;

                    if (expression.startsWith('rate')) {
                        scheduleTypeSelect.value = 'rate';
                        rateSettings.style.display = 'block';
                        cronSettings.style.display = 'none';

                        const match = expression.match(/rate\((\d+)\s+(minutes|hours|days)\)/);
                        if (match) {
                            rateValue.value = match[1];
                            rateUnit.value = match[2];
                        }
                    } else if (expression.startsWith('cron')) {
                        scheduleTypeSelect.value = 'cron';
                        rateSettings.style.display = 'none';
                        cronSettings.style.display = 'block';

                        const match = expression.match(/cron\(([^)]+)\)/);
                        if (match) {
                            const parts = match[1].split(' ');
                            cronMinutes.value = parts[0] || '*';
                            cronHours.value = parts[1] || '*';
                            cronDayOfMonth.value = parts[2] || '*';
                            cronMonth.value = parts[3] || '*';
                            cronDayOfWeek.value = parts[4] || '*';
                            cronYear.value = parts.length > 5 ? parts[5] : '*';
                        }
                    }
                    updateSchedulePreview();
                }

                showStatus(`ルール '${ruleName}' を正常に取得しました`, 'success');
            } catch (error) {
                console.error('ルールの取得中にエラーが発生しました:', error);
                showStatus(`エラー: ${error.message}`, 'error');
            } finally {
                getRuleButton.disabled = false;
                getSpinner.style.display = 'none';
            }
        });

        function showStatus(message, type) {
            statusMessage.textContent = message;
            statusMessage.className = 'status-message ' + type;
            statusMessage.style.display = 'block';

            setTimeout(() => {
                statusMessage.style.display = 'none';
            }, 5000);
        }
    </script>
</body>

</html>
④同様にserver.jsを作ります。
vi server.jsファイルには以下の内容を記載してください。
const express = require('express');
const bodyParser = require('body-parser');
const { CloudWatchEvents } = require('aws-sdk');
const path = require('path');

const app = express();
const PORT = process.env.PORT || 8080;

app.use(bodyParser.json());
app.use(express.static(path.join(__dirname, 'public')));

app.post('/api/rules/update', async (req, res) => {
        try {
                const { region, ruleName, scheduleExpression } = req.body;

                if (!region || !ruleName || !scheduleExpression) {
                        return res.status(400).json({
                                success: false,
                                message: 'リージョン、ルール名、スケジュール式は必須です'
                                });
                        }

                const eventBridge = new CloudWatchEvents({ region });

                const params = {
                        Name: ruleName,
                        ScheduleExpression: scheduleExpression
                        };

                await eventBridge.putRule(params).promise();

                res.json({
                        success: true,
                        message: `ルール '${ruleName}' が正常に更新されました`
                        });
            } catch (error) {
                    console.error('EventBridgeルール更新エラー:', error);
                    res.status(500).json({
                            success: false,
                            message: error.message || 'サーバーエラーが発生しました'
                        });
                    }
});


app.get('/api/rules/get', async (req, res) => {
        try {
                const { region, ruleName } = req.query;

                if (!region || !ruleName) {
                        return res.status(400).json({
                                success: false,
                                message: 'リージョンとルール名は必須です'
                                });
                        }

                const eventBridge = new CloudWatchEvents({ region });

                const params = {
                        Name: ruleName
                        };

                const ruleData = await eventBridge.describeRule(params).promise();

                                  res.json(ruleData);
                                } catch (error) {
                                        console.error('EventBridgeルール取得エラー:', error);
                                        res.status(500).json({
                                              success: false,
                                              message: error.message || 'サーバーエラーが発生しました'
                                            });
                                      }
                    });

                    app.get('/', (req, res) => {
                          res.sendFile(path.join(__dirname, 'public', 'index.html'));
                    });

                    app.listen(PORT, () => {
                          console.log(`サーバーが起動しました: http://localhost:${PORT}`);
                    });
⑤次は「web.config」を作ります。
vi web.configファイルには以下の内容を記載してください。
<?xml version="1.0" encoding="utf-8"?>
<configuration>
<system.webServer>
    <handlers>
    <add name="iisnode" path="server.js" verb="*" modules="iisnode" />
    </handlers>
    <rewrite>
    <rules>
        <rule name="StaticContent">
        <action type="Rewrite" url="public{REQUEST_URI}" />
        <conditions>
            <add input="{REQUEST_FILENAME}" matchType="IsFile" negate="True" />
        </conditions>
        </rule>
        <rule name="DynamicContent">
        <match url="/*" />
        <action type="Rewrite" url="server.js" />
        <conditions>
            <add input="{REQUEST_FILENAME}" matchType="IsFile" negate="True" />
        </conditions>
        </rule>
    </rules>
    </rewrite>
    <iisnode
    nodeProcessCommandLine=""%programfiles%\nodejs\node.exe""
    watchedFiles="*.js;iisnode.yml;node_modules\*"
    loggingEnabled="true"
    logDirectory="iisnode"
    />
</system.webServer>
<system.web>
    <compilation debug="true" />
</system.web>
</configuration>
⑥必要な資材が揃ったので、依存関係ごとフォルダを圧縮します。
npm install -g npm-bundle
npm-bundle
⑦出来上がった「eventbridge-manager-1.0.0.tgz」をダウンロードし、ダウンロードしたインストールモジュールを含めてWebサーバを構築するEC2に持ち込んでください。
IIS関連のインストール
①資材を持ち込むと、インストールモジュール3つとプログラムファイルが1つあるはずです。
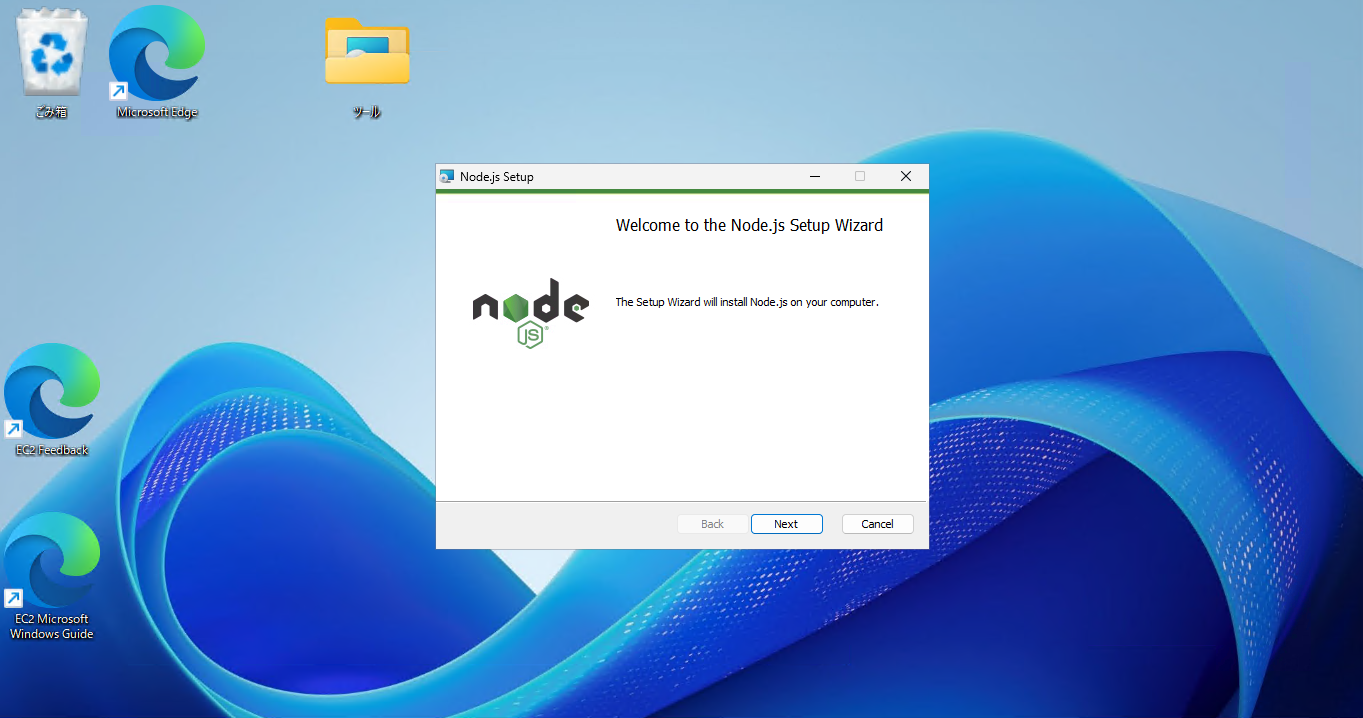
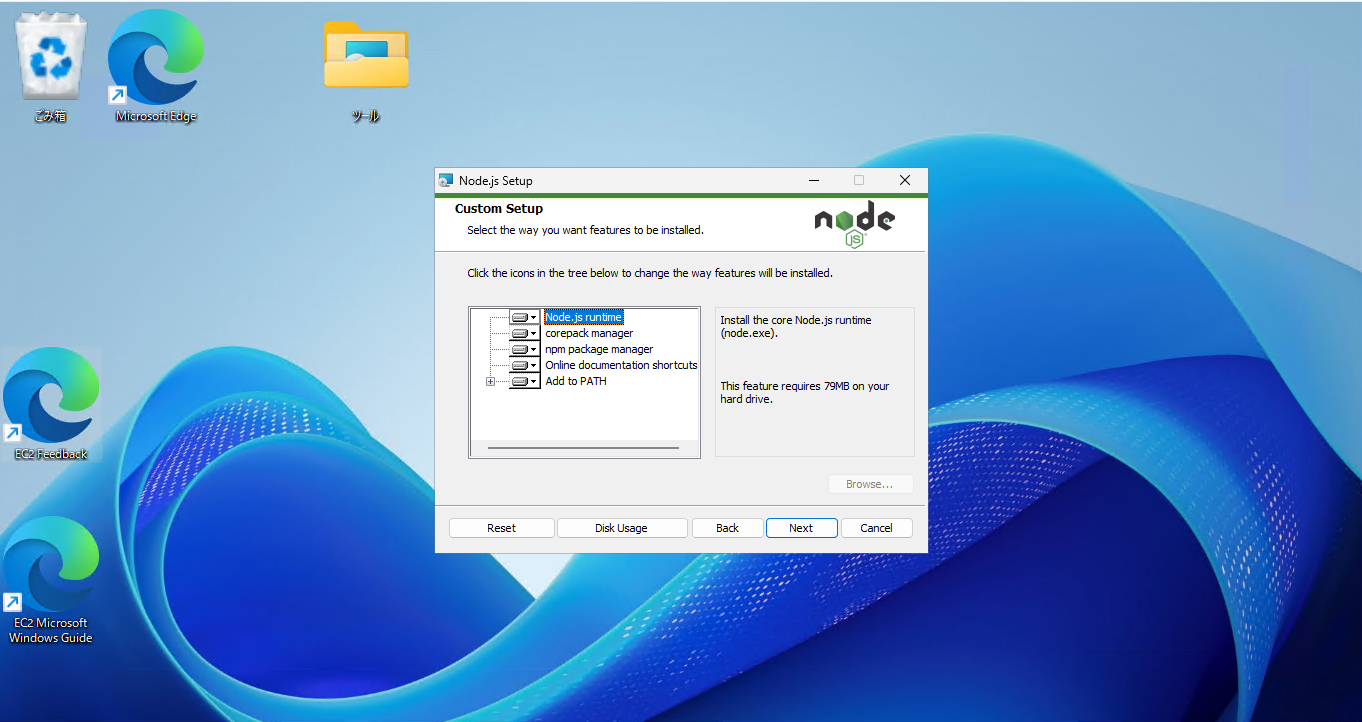
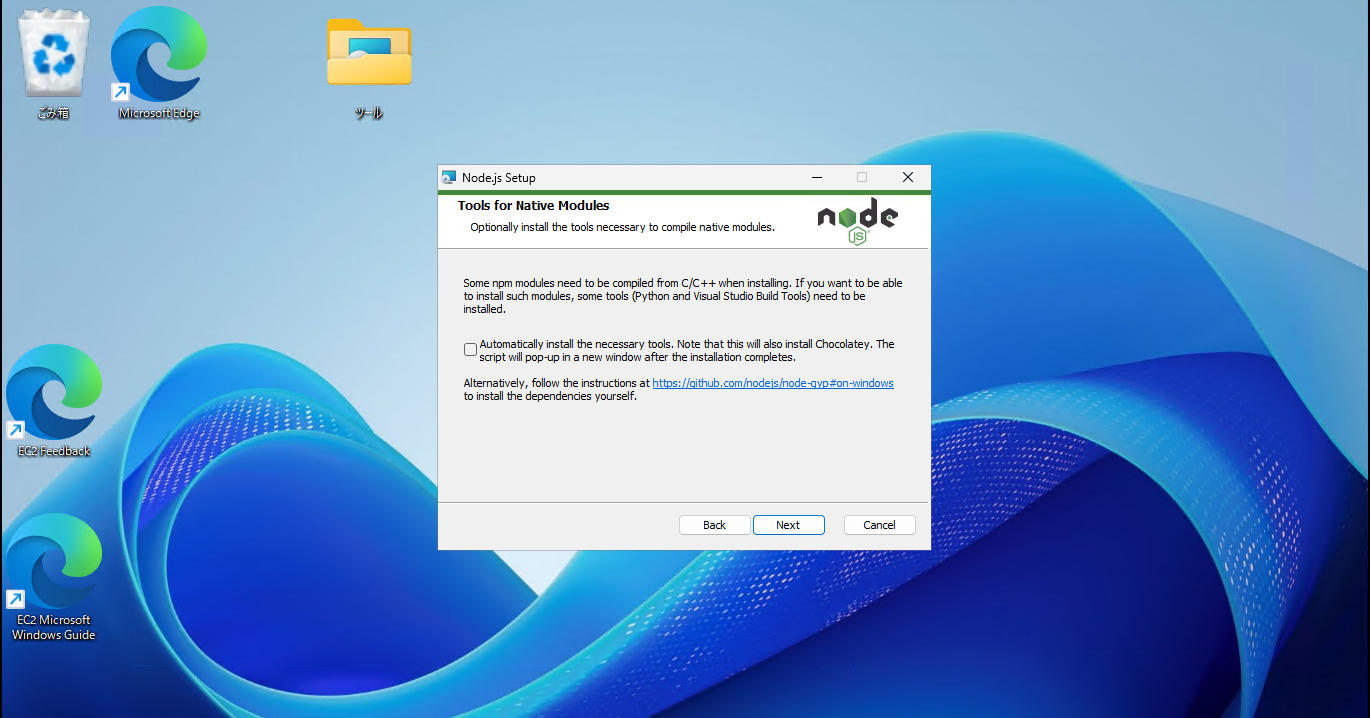
②まずは、「Node.js」のインストールから始めましょう。
インストールオプションはデフォルトで進めて大丈夫です。


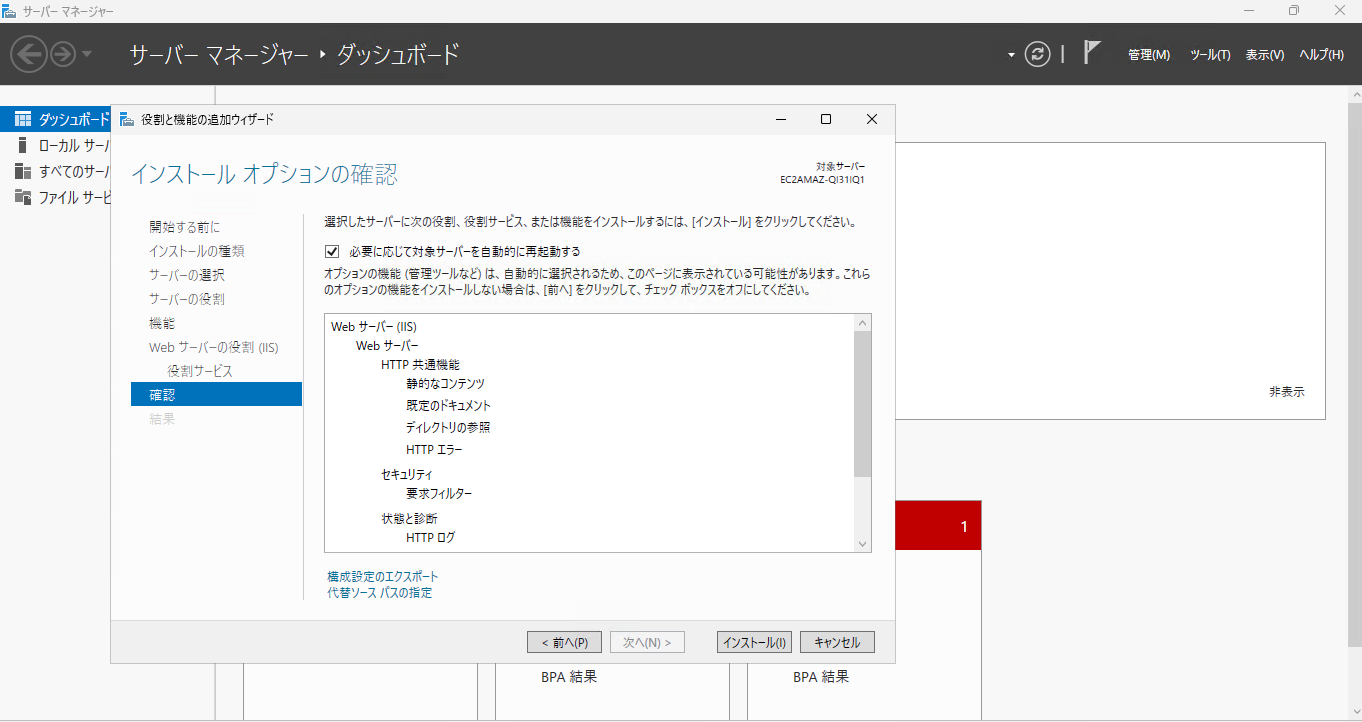
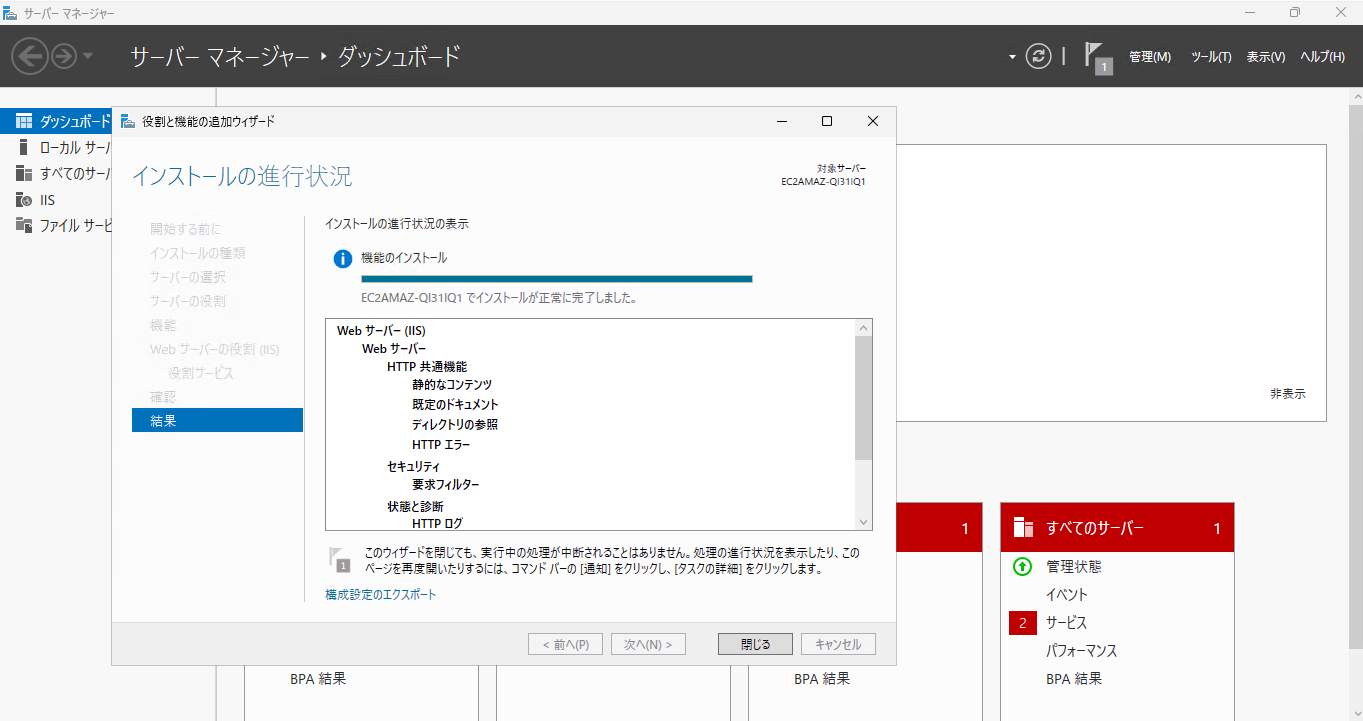
③IISの役割を導入します。
サーバマネージャーの「機能と役割の追加」から「Webサーバ(IIS)」を選択し、導入してください。

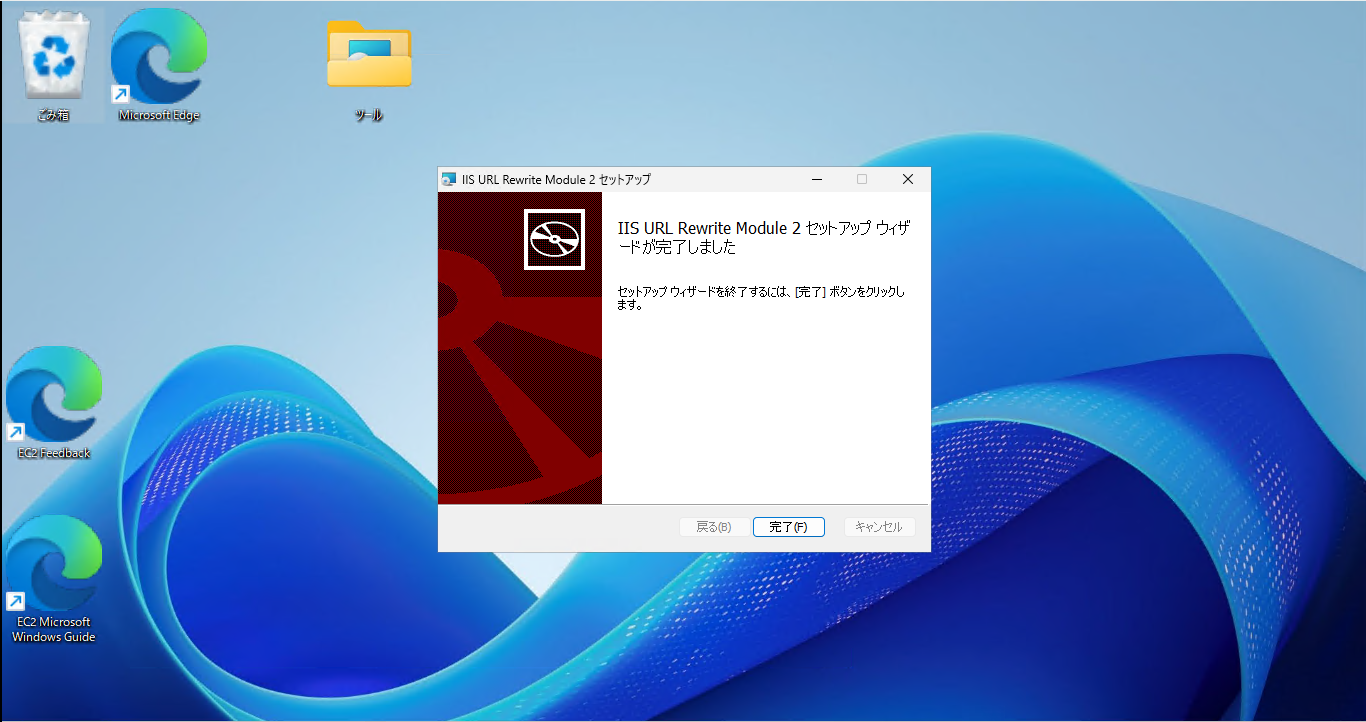
④URL Rewriteモジュールをインストールします。
こちらのインストールオプションもデフォルトで進めて大丈夫です。

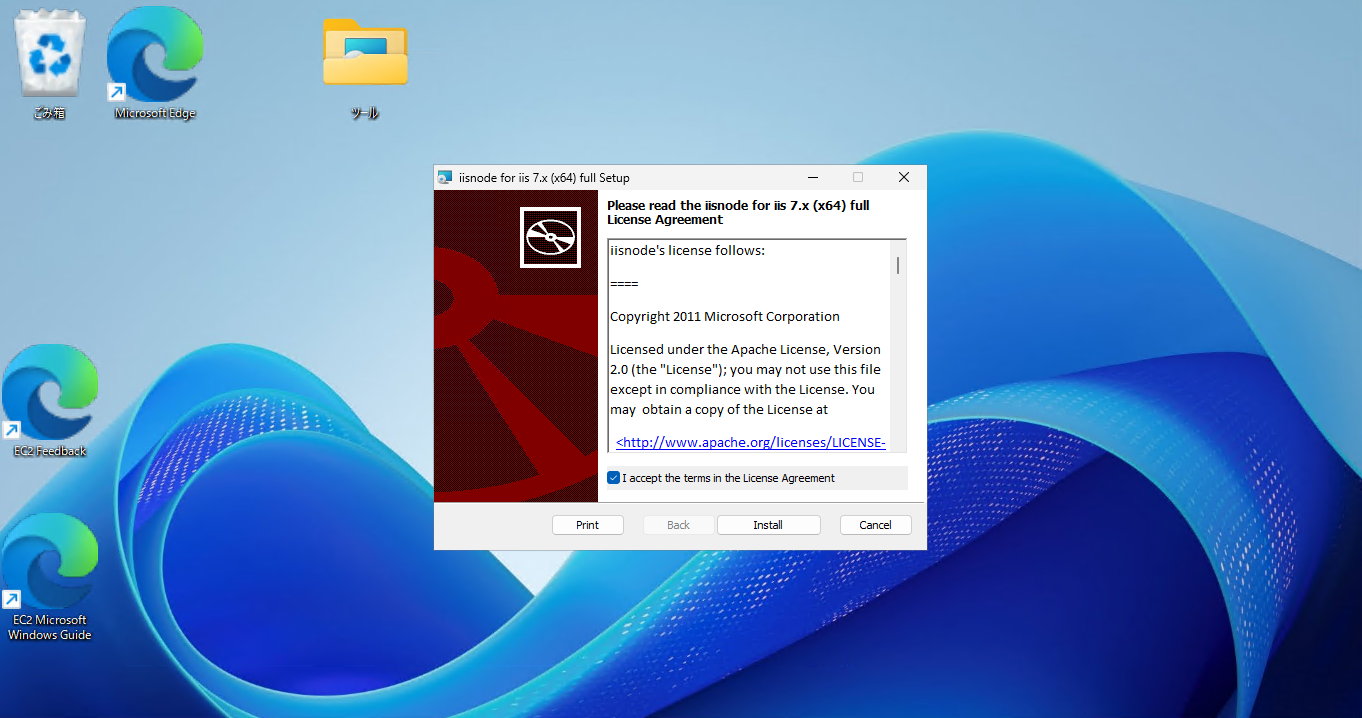
⑤iisnodeをインストールします。
こちらのインストールオプションもデフォルトで進めて大丈夫です。

IISのWebサービス構築
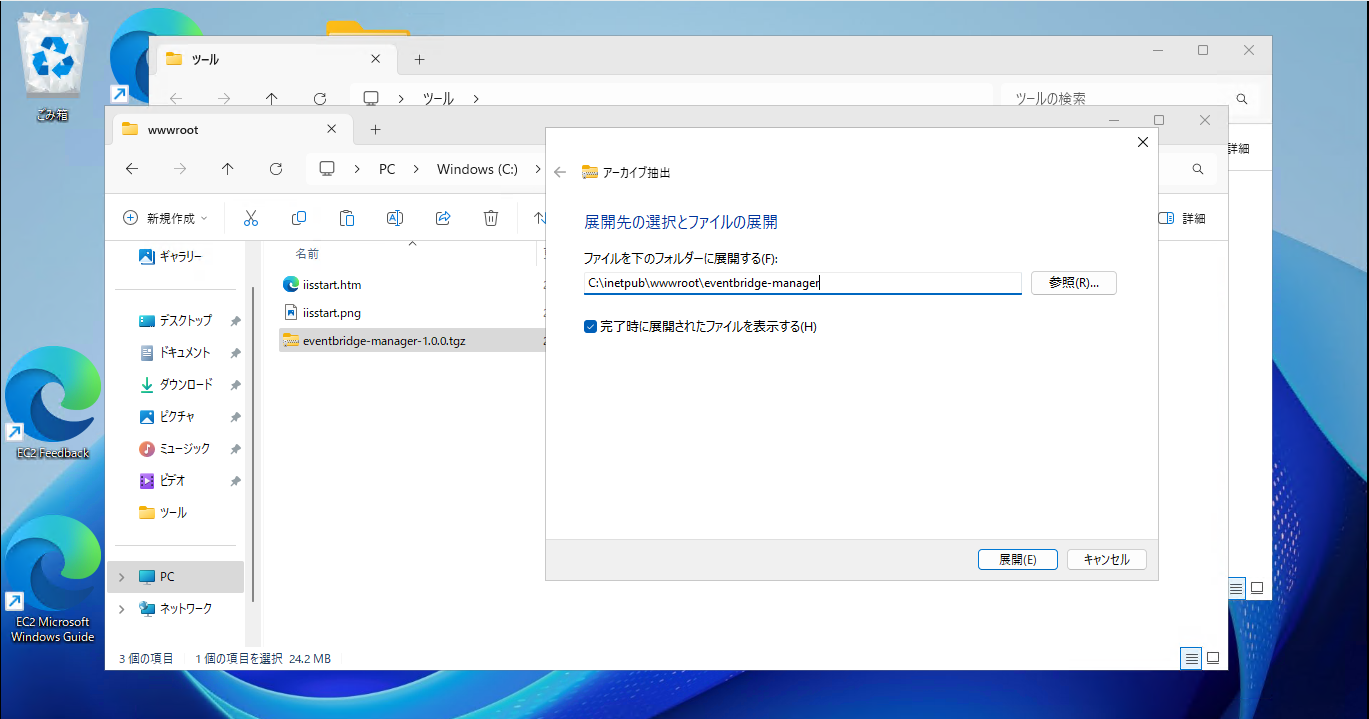
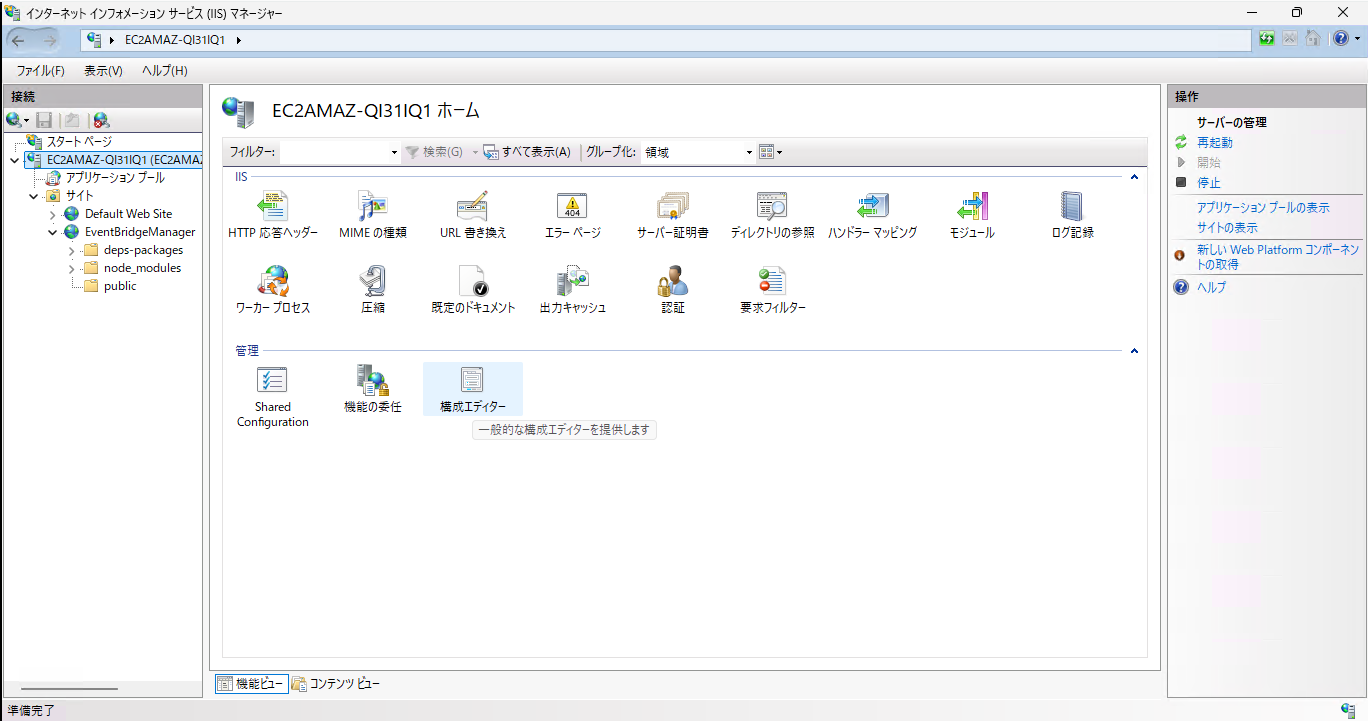
①持ってきたプログラム資材を「C:\inetpub\wwwroot」以下に解凍します。「C:\inetpub\wwwroot\eventbridge-manager」直下に作成したserver.jsやWeb.config、publicフォルダ等があればOKです。
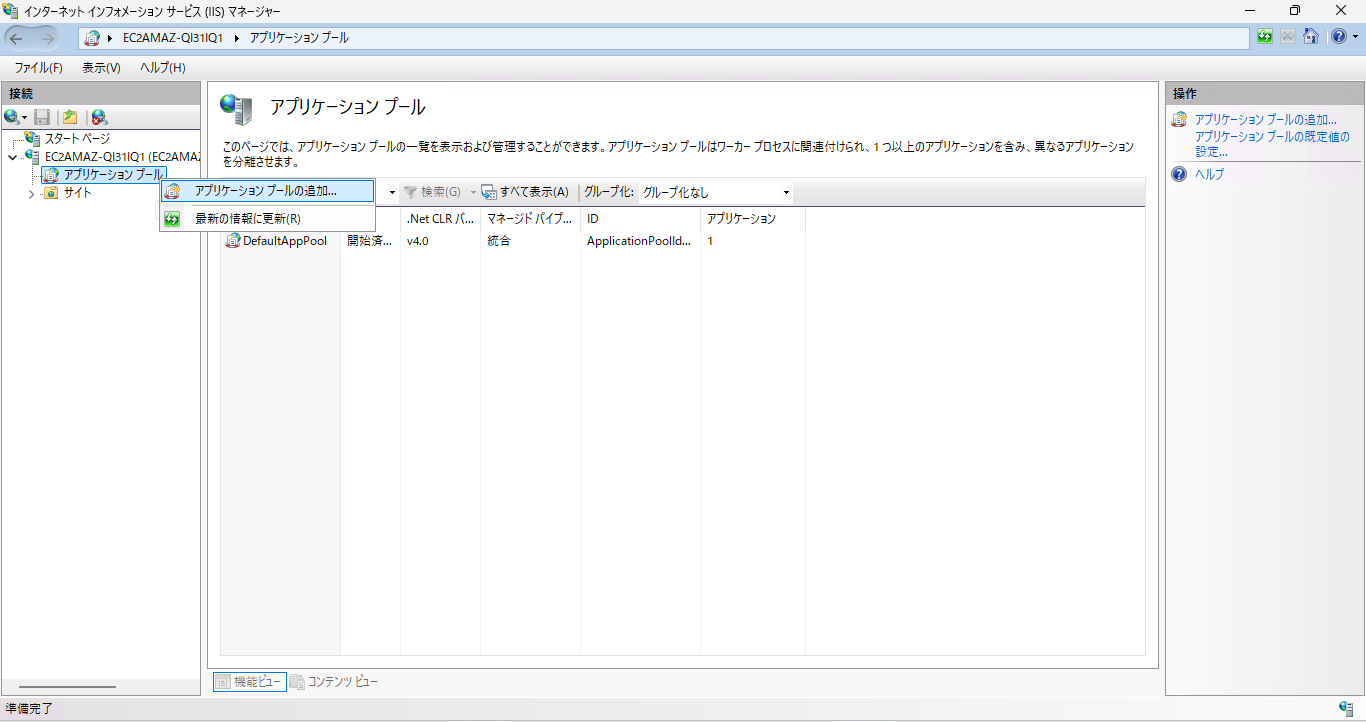
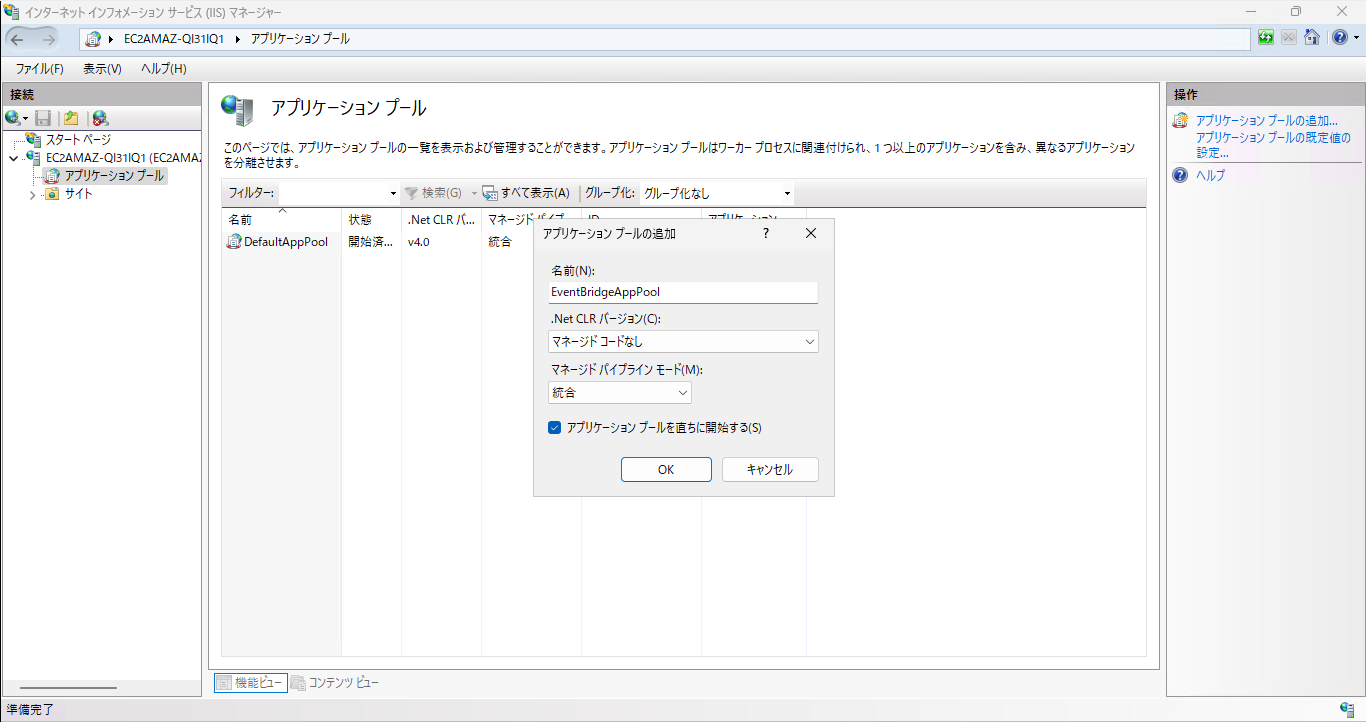
②スタートから「IISマネージャー」を起動し、「アプリケーションプールの追加」を行います。
名前は適当でも構いません。
.Net CLRバージョンは「マネージドコードなし」とします。
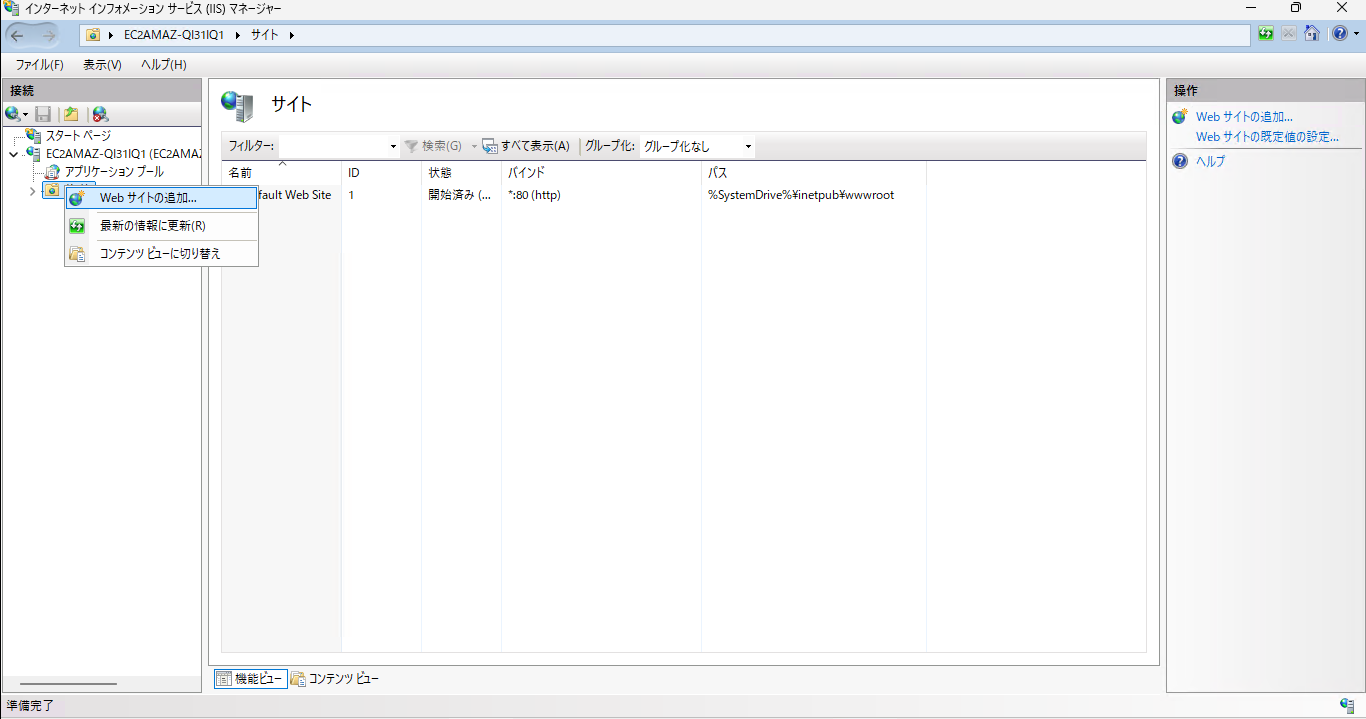
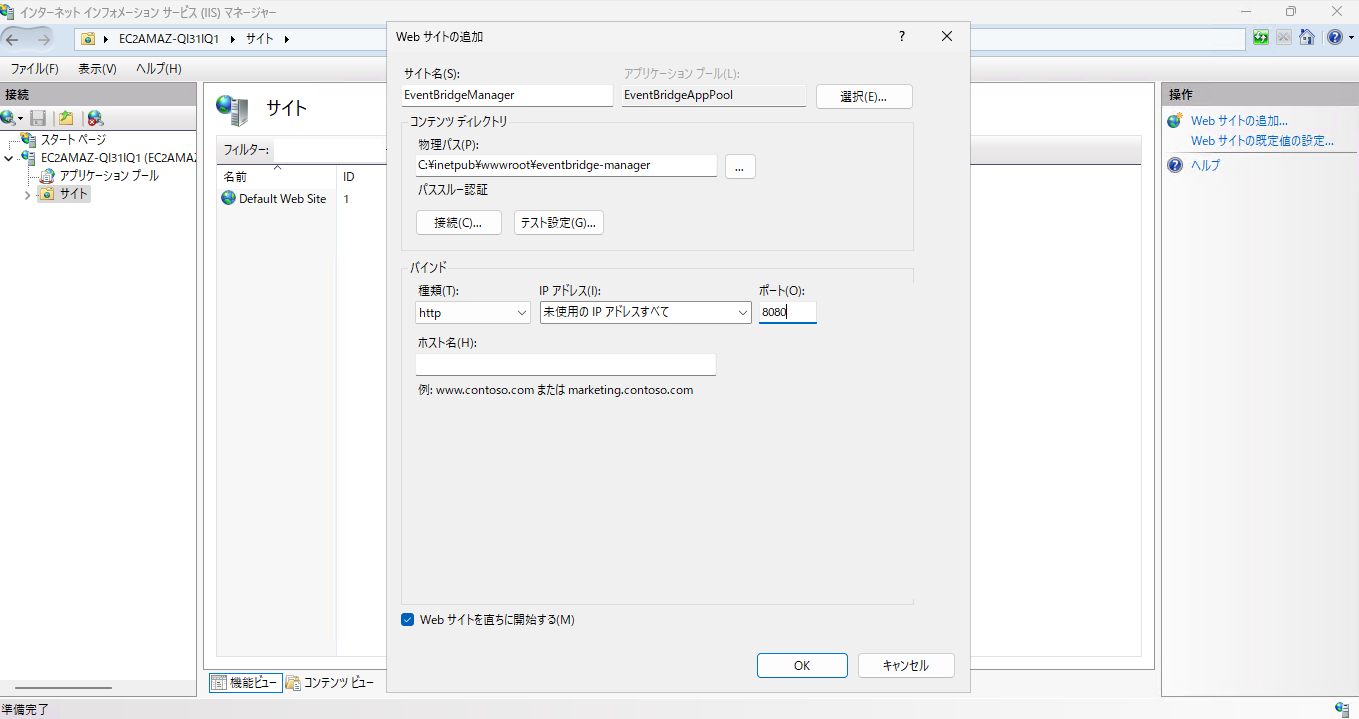
③Webサイトを追加します。
サイト名は適当で大丈夫です。
物理パスは、プログラムを解凍して配置↓フォルダで、ポートは「8080」とします。
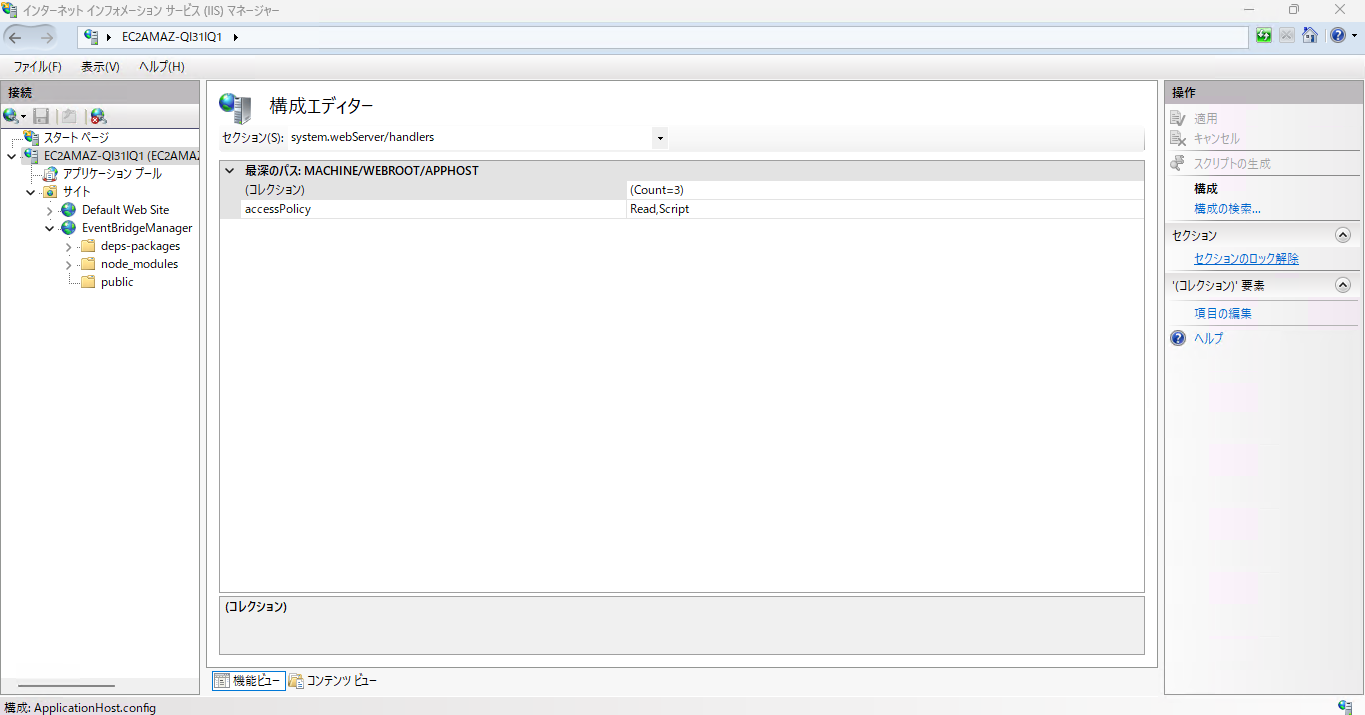
④このままではまだ繋げられないので、「セクションのロック解除」を行います。
サーバの「構成エディタ」から、セクション「system.webServer/handlers」を指定して、右のメニューにある「セクションのロック解除」を押下します。
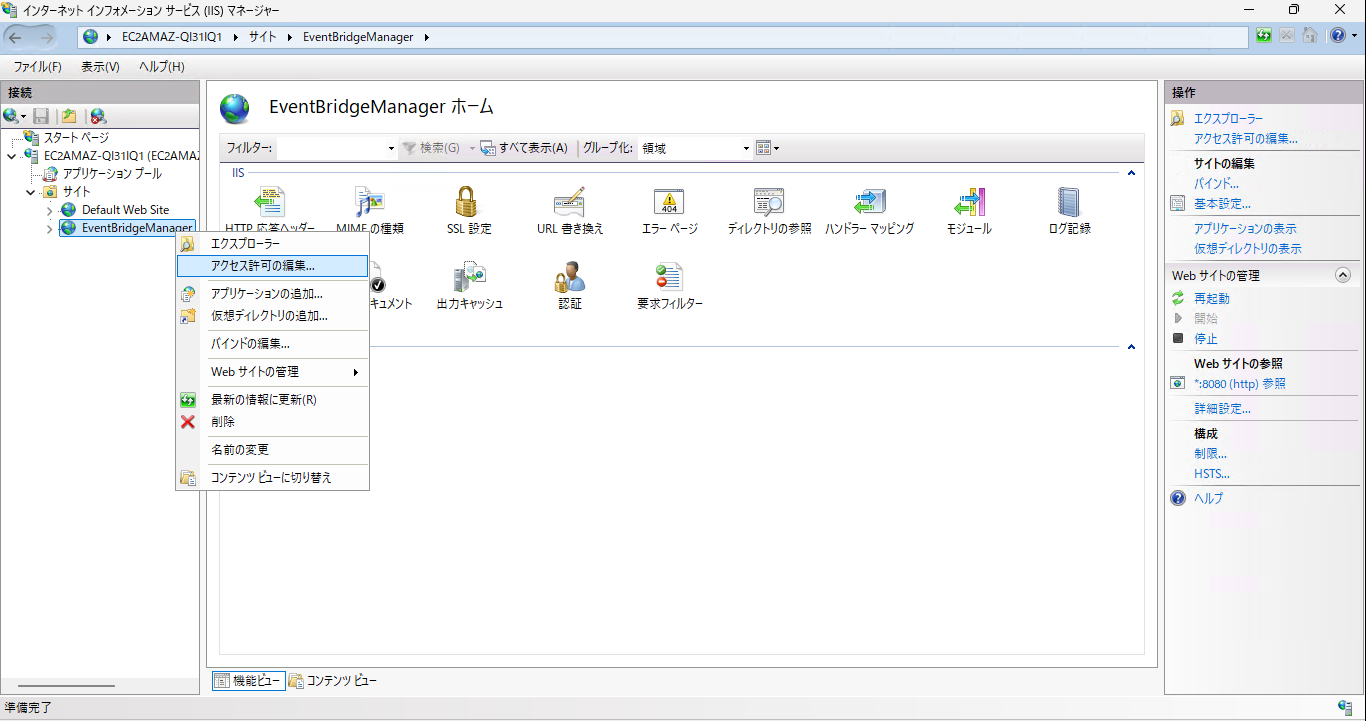
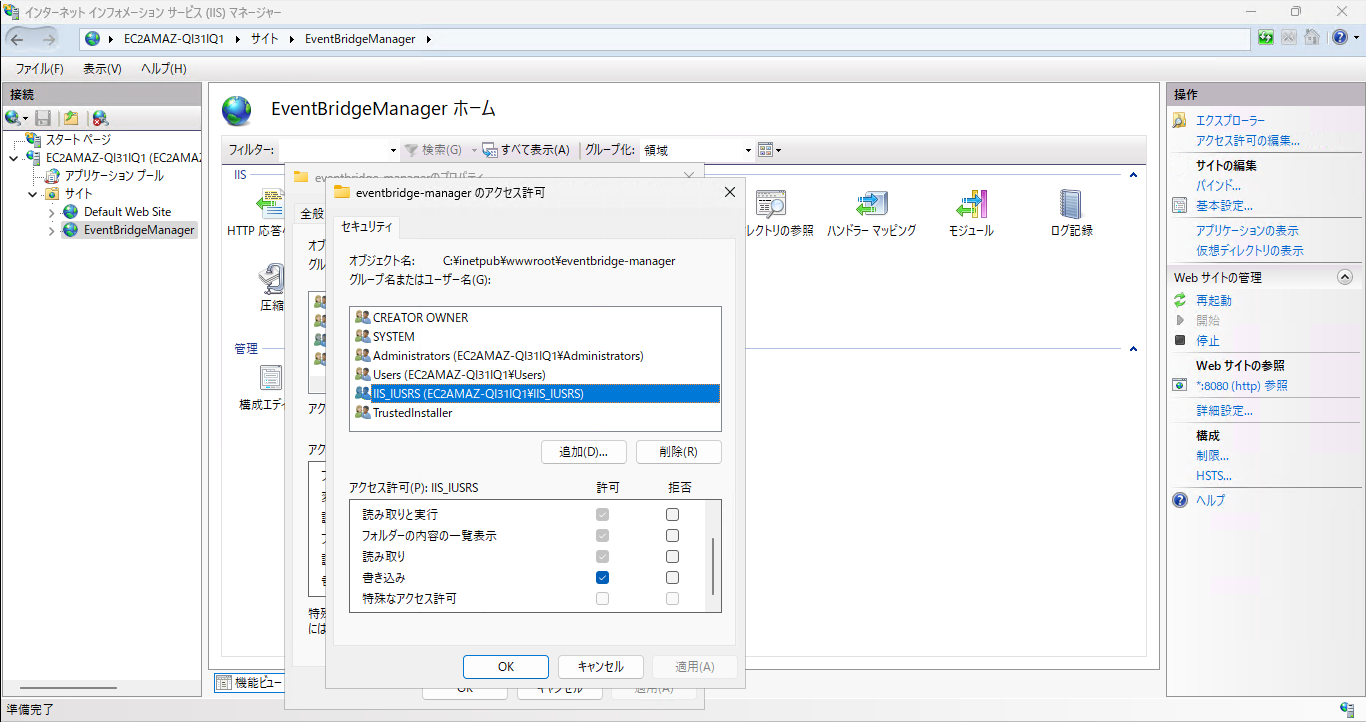
⑤作成したアプリケーションプールにフォルダへのアクセス権限を付与します。
基本的な権限は付いていますが、「書き込み」だけなかったので追加します。
EventBridgeのスケジュール更新
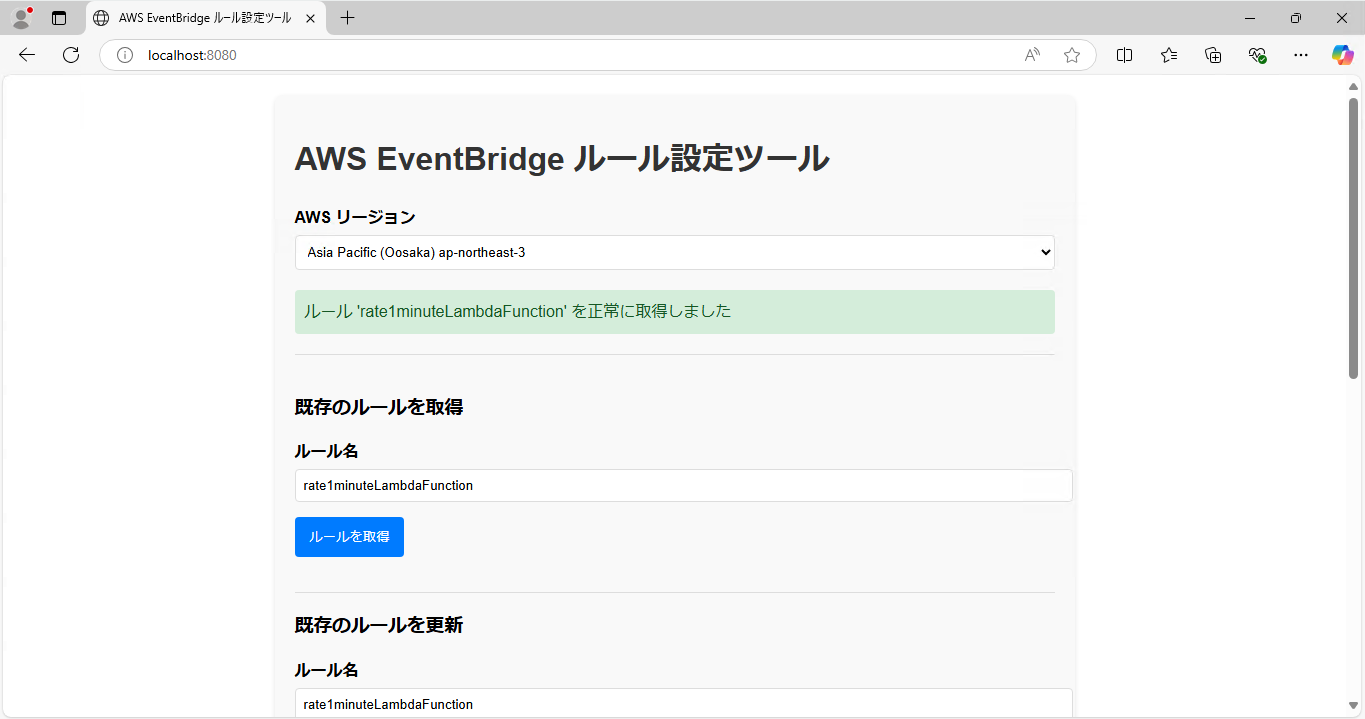
①ブラウザから「localhost:8080」にアクセスします。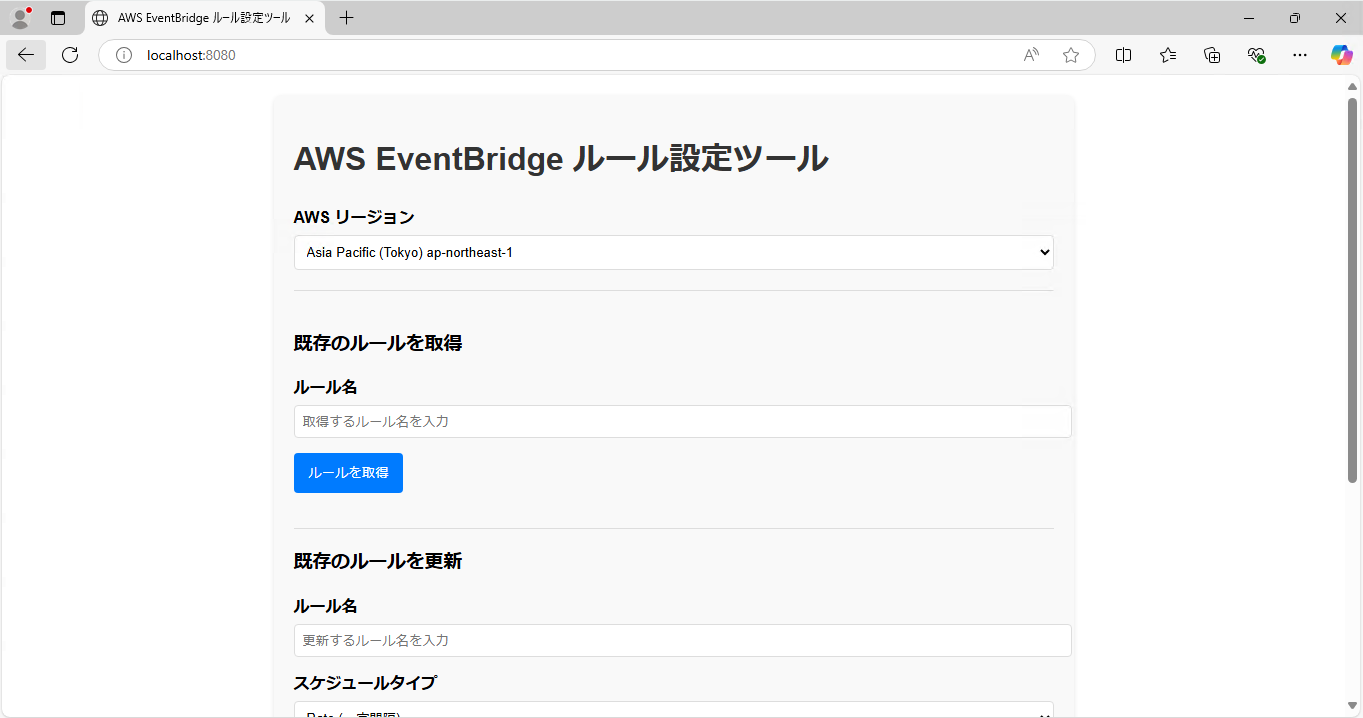
②リージョンとルール名を指定して「ルールを取得」を行い、正常に実行されましたね。
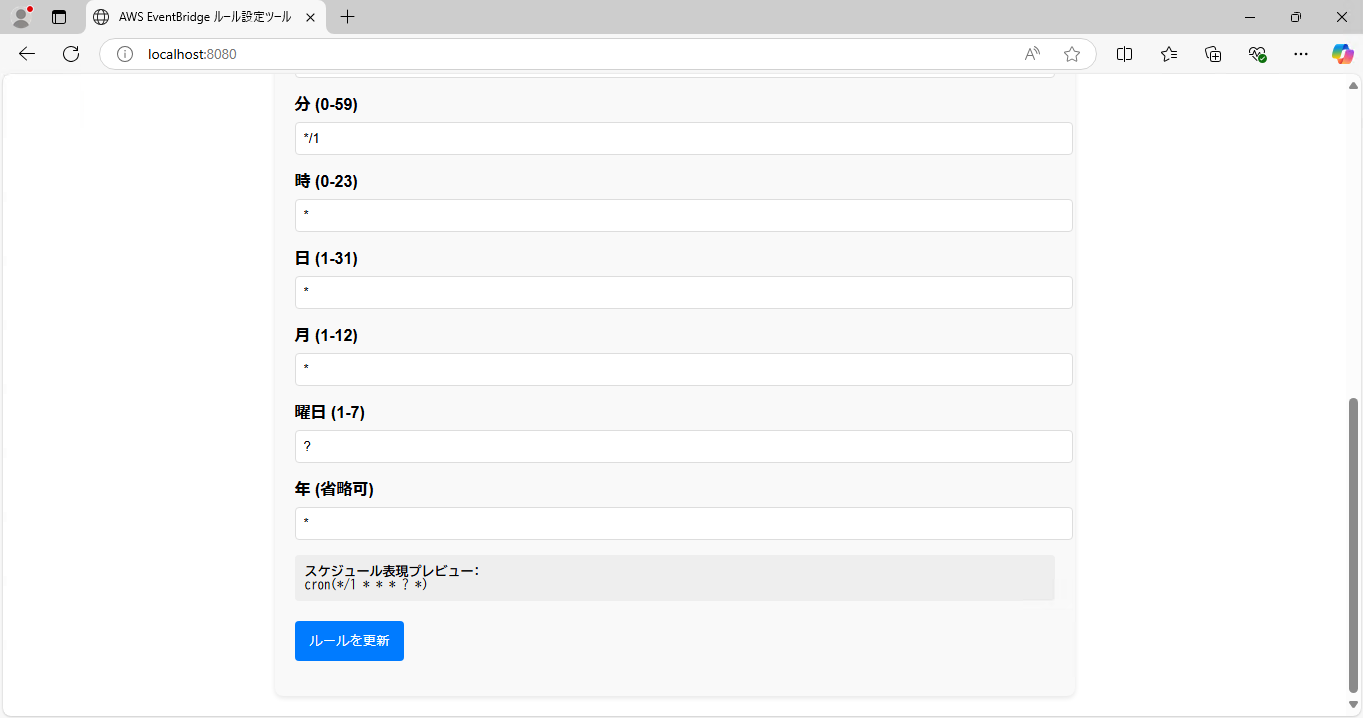
③スケジュールの数字を変更して「ルールを更新」を行い、正常に実行されましたね。
まとめ
WebサービスのフロントエンドとEventBridgの参照と更新を行うバックエンド処理をそれぞれ実装してみました。
インストール環境はインターネットにつながらないことを前提にしてやっています。
バックエンドのEventBridgの参照と更新処理も閉域通信にできましたし、しっかりとセキュアな構成が組めたと思います。
今回ご紹介したこのアプリケーションをそのまま使うことは少ないかもしれませんが、同様な構成でAWSの操作処理やEventBridgeの変更処理ができますので、是非色々と試してみてください。
インストール環境はインターネットにつながらないことを前提にしてやっています。
バックエンドのEventBridgの参照と更新処理も閉域通信にできましたし、しっかりとセキュアな構成が組めたと思います。
今回ご紹介したこのアプリケーションをそのまま使うことは少ないかもしれませんが、同様な構成でAWSの操作処理やEventBridgeの変更処理ができますので、是非色々と試してみてください。